Adding a geometric accent wall is a fantastic way to inject personality and visual interest into your living spaces. Here’s our step by step process for painting a geometric featured wall at your place.
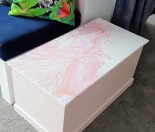
This DIY bold, blush pink triangle spans the corner of two walls. Our feature wall happens to be over an inside corner, where our lounge wall meets the hallway wall. But you’ll get the same effect painting this across an outside corner, where your feature wall meets an outside wall.
Feature walls tend to come and go in terms of ‘style’. But we think they’re great!
The secret to great feature walls is to take the feature over two walls. If you wrap your feature wall onto the wall it connects with, it’s more harmonious to the space, and feels like the feature wall is blending into the space, rather than being seperate from it.
So in our project we’ve wrapped a giant triangle across two walls, with both the triangle colour and the base colour used on both walls.
We also reused our favourite interior pink colour Resene Dust Storm. It’s a really smart ‘grown up’ pink that really picks up the colour of sunsets we get on that wall. We used this in our previous renovation and loved it so much, we went even bigger and bolder this time.
You will need
Fine sandpaper, Selley’s No More Gaps gap filler, Selley’s Permafill plaster
3M painters tape
Pencil and Level or straightline
Paint brush and pot
Paint roller and tray, roller handle, and 12mm roller sleeve
Ladder and dropsheets
Resene Dust Storm and Freelance (or contrasting colours that suit your own home and personality)
Prep
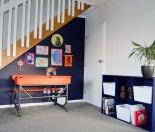
Move all furniture and wall hangings away from the walls. Cover the floor with drop sheets to protect it from paint splatters.
If the wall is already painted, lightly sand it with fine-grit sandpaper to scuff up the surface and remove any imperfections from the old paint. You’ll find a sanding head attached to a roller pole makes this job easy.
If the wall is bare plasterboard then paint a coat of Resene Wallboard Sealer to seal the walls and ensure an even coverage.
Fill any holes or dents in the wall with Selley’s rapid filler. Smooth out the surface with a plaster blade, and let it dry completely. Sand any patched areas until level with the surrounding wall. You’ll need to apply a quick coat of Sealer over the plaster.
Fill any gaps around the architraves or skirting boards with Selly’s No More Gaps. Use a wet cloth to smooth off the gap filler before it dries.
Painting
Paint your base colour on first, we used Resene Freelance a funky green colour with a hint of blue, but not quite aqua. Block in the wall past where you want the triangle to go with two coats of paint. Use a brush to cut in along the edges of the ceiling, walls, and any door or window frames, and use the roller for the main areas. Be sure to roll over the whole wall with a mostly dry roller to remove any roller lines. Allow each coat to dry completely before applying the next.

Now for the fun part! Use a pencil to lightly mark where you want the triangle to start and end on the wall. Try and take the triangle to around two-thirds of the wall. Half way along, or taken right to the corner, won’t give the same effect. Now run a level or straight edge between the two points, and lightly mark 4 or 5 points along the wall.
Then use the painter’s tape to tape a straight line between the points, from floor to ceiling. Try and keep the tape taught and straight as you go, and firmly press down the edge to prevent paint from sneaking under.

Now paint in the triangle sections, using Resene Dust Storm. Again use the brush to cut in around the walls, ceiling and the taped line. Apply two good coats of paint, laying off with a dryish roller, and letting each coat dry completely before adding the next.

Carefully peel off the painter’s tape. I like to use a craft knife at this point, and just carefully peel off the tape against the craft knife as you go. This way if any paint is going to pull you can cut it with the knife before the tape pulls it off the wall.
Finally, after a quick sweep and a vacuum, rehang any wall hangings or features, and move the furniture back in. We went all out and even installed a fireplace next to our feature wall, and we love it!

For heaps more DIY tips and tricks, check out our Home and DIY section.