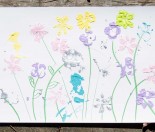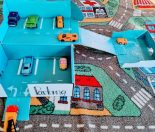
This easy no-cook playdough recipe uses just five basic ingredients and takes about 10 minutes to make. The finished dough is soft, smooth and easy for little hands to roll, squish and shape.

There is no saucepan and no cooking on the stove. You will need boiling water, though, so an adult should handle the hot-water steps while children help measure, choose colours and knead the cooled dough.

The quick version

  • Preparation time: About 10 minutes
  • Ingredients: Flour, salt, oil, boiling water and food colouring
  • Yield: One large batch
  • Texture: Soft, smooth and easy to mould
  • Best for: Supervised play for children aged 3 and older
  • Storage: Airtight container in the fridge

Playdough has rescued more rainy afternoons in our house than I can count. When the kids are bored, the weather is awful and I don’t have the energy to organise a complicated craft, this is the recipe I reach for.

We usually put the dough on the table with cookie cutters, a rolling pin and whatever safe kitchen tools I can find. Some days they make pretend cakes. Other days it becomes an entire kingdom populated by slightly wonky animals. I try not to direct it too much—the best games are usually the ones they invent themselves.

Why this homemade playdough recipe works

This has been our go-to rainy-day recipe because it is quick, inexpensive and made with ingredients we usually have in the pantry. The salt helps give the dough structure, the oil keeps it pliable and the hot water helps dissolve the salt so the finished playdough feels smoother.

It is also easy to adjust. If the dough feels sticky, add a little more flour. If it feels crumbly, knead in a few drops of water or oil. You do not need laboratory-perfect measurements to rescue a batch.

Easy kids’ activity

Easy no-cook playdough recipe

Make a soft batch of homemade playdough in about 10 minutes using five everyday ingredients.

Prep: 10 minutes
Yield: 1 large batch
Difficulty: Easy

Ingredients

  • 3 cups plain flour, plus extra if needed
  • 1/4 cup salt
  • 3 tablespoons neutral cooking oil
  • 1 cup boiling water
  • A few drops of food colouring

Equipment

  • Large heatproof mixing bowl
  • Measuring cups and tablespoon
  • Wooden spoon or sturdy spatula
  • Clean bench or board for kneading
  • Airtight container for storage

Adult supervision: An adult should measure and pour the boiling water and supervise until the mixture is cool enough to touch.

Method

  1. Mix the salt and oil. Put the salt and cooking oil into a large heatproof bowl. Stir them together. The mixture will look dry and grainy.
  2. Add the boiling water. An adult should carefully pour in the boiling water. Stir until most of the salt has dissolved.
  3. Add the colour. Stir in a few drops of food colouring. It is easier to distribute the colour evenly before adding the flour.
  4. Add the flour gradually. Mix in the flour one cup at a time. Stop when the mixture begins to come together as a soft dough.
  5. Cool and knead. Leave the mixture until it is cool enough to handle safely. Tip it onto a clean bench and knead for two to three minutes, until smooth and no longer sticky.

Before playing: Check the centre of the dough with your hand to make sure it has cooled completely.

How to fix homemade playdough

Flour absorbs water differently depending on the brand, the weather and how accurately it was measured. Use the quantities as a starting point and adjust the texture after kneading.

Problem What to do
The playdough is sticky Knead in one tablespoon of flour at a time until the dough stops sticking to your hands.
The playdough is dry or crumbly Add water a few drops at a time and knead well. A small drop of oil can also restore softness.
The colour is streaky Continue kneading. Wear gloves if you are using a strong food colour that may temporarily stain hands.
The dough feels grainy Knead it while slightly warm. Next time, stir the salt in the boiling water for longer before adding flour.
The dough is too oily Add one tablespoon of flour at a time and knead between additions.

How to make several playdough colours

For several colours, make the dough without food colouring and divide it into smaller portions after it has cooled. Make a small indentation in each portion, add one or two drops of colour and knead until evenly distributed.

Use gloves and knead each colour on baking paper if you want to protect your hands and bench. Start with very little colouring; you can always add more.

Parent tip: If you know you want three colours, it is often faster to make three smaller batches and add the colouring to the water in each bowl.

How to store homemade playdough

Once the playdough has cooled completely, press out excess air and place it in a clean airtight container or reusable zip bag. Store it in the fridge between play sessions.

Always check the dough before giving it back to your child. Throw it away if it smells unusual, shows mould, becomes excessively wet or dirty, or has been in contact with illness. Do not share used playdough between households.

If it is only slightly dry, knead in a few drops of water. If it is slightly sticky from condensation, knead in a spoonful of flour.

Is homemade playdough safe to eat?

No. This playdough is not edible or taste-safe. It contains a large amount of salt, and flour is a raw agricultural ingredient. Children should be supervised so they do not eat the dough, and everyone should wash their hands after making and using it.

The New Zealand Ministry of Education includes uncooked and cooked playdough recipes in its home play guidance. If your child regularly mouths sensory materials, consider waiting or using a commercially prepared product intended for that age group.

Food-safety guidance differs internationally. The United States Food and Drug Administration advises against giving children play materials made with raw flour because flour can carry harmful germs. Families who prefer to follow that stricter guidance should choose commercially manufactured playdough or the cooked playdough option in the New Zealand guidance above.

Plain flour contains wheat and gluten. Use a separate allergy-appropriate playdough recipe if your child has a wheat allergy, coeliac disease or needs to avoid cross-contact.

Why playdough is good for children

Squashing, pinching, rolling and cutting playdough gives children an open-ended way to use their hands and imagination. New Zealand Ministry of Education guidance says playdough can support creativity, imagination and fine-motor development.

It can also introduce early maths and language naturally. Children compare sizes, divide dough into portions, make shapes, count objects and explain the stories behind their creations.

Read more about the benefits of learning through creative play, or see the Ministry of Education’s guide to learning with playdough.

10 easy things to do with playdough

  1. Build a pretend bakery. Make biscuits, cupcakes, fruit and birthday cakes.
  2. Practise letters. Roll long playdough snakes and shape them into letters or names.
  3. Make simple numbers. Form numbers and create the matching number of small balls.
  4. Create faces. Add playdough eyes, noses, mouths and funny hairstyles.
  5. Stamp patterns. Use clean blocks, forks, leaves or homemade shape stamps.
  6. Make animals. Start with balls and sausages, then combine them into creatures.
  7. Hide and find. Hide large age-appropriate objects in the dough for children to uncover.
  8. Sort colours. Match buttons, craft sticks or other safe objects to different dough colours.
  9. Build a miniature garden. Make flowers, insects, trees and pathways.
  10. Tell a story. Let children create characters and use them to act out an adventure.

For more inspiration, try these seven playdough craft activities or make your own playdough shape stamps.

Can you bake this playdough?

You can dry small creations at a low oven temperature, but this soft playdough recipe is designed primarily for play and may crack or change colour when baked. If you want decorations or keepsakes that set hard, a dedicated salt-dough recipe will usually produce more reliable results.

If you do dry a small creation, an adult should handle the oven. Never bake pieces containing plastic decorations, glitter or other objects that are not oven-safe.

Frequently asked questions

Why is it called no-cook playdough if it uses boiling water?

The mixture is not cooked in a saucepan or on a stove. Boiling water is used to dissolve the salt and bring the dough together, so an adult still needs to handle that part.

Can children help make it?

Children can measure the cooled ingredients, choose colours and knead the dough after it has cooled. An adult should pour the boiling water, stir the hot mixture and check its temperature.

What type of flour should I use?

Plain flour works best. Self-raising flour is unnecessary because the playdough does not need to rise.

Can I make playdough without salt?

Salt contributes to the texture and helps the dough keep longer. A salt-free recipe requires different proportions and will not store in the same way, so it is better to follow a recipe developed specifically without salt.

Why is my playdough sticky the next day?

Condensation or slightly too much water can make stored dough sticky. Knead in one tablespoon of flour at a time until the texture feels smooth again.

How do I keep playdough soft?

Store completely cooled playdough in an airtight container in the fridge. If it starts drying out, knead in a few drops of water rather than adding a large amount at once.

Can I add fragrance or essential oils?

Fragrance is not necessary and may irritate sensitive skin. Avoid essential oils unless you have checked that the specific product, dilution and use are appropriate for your child. Unscented playdough is the simplest option.

Does food colouring stain hands?

A small amount mixed thoroughly into the water usually produces minimal transfer. Concentrated colours may stain temporarily, so start with a few drops and wear gloves while kneading if needed.

Save this playdough recipe

Keep it for the next rainy afternoon, school holiday or moment when somebody announces, “I’m bored.”

Five ingredients. Ten minutes. Plenty of quiet, creative play.

More easy activities for kids

3.2 12 votes
Article Rating
Author

This information was compiled by the Kiwi Families team.

Subscribe
Notify of
guest

0 Comments
newest
oldest most voted
Inline Feedbacks
View all comments
0
Would love your thoughts, please comment.x
()
x