There’s nothing more I like than hand made, custom objects about the home. One of the simplest ways to create custom items is to just paint over objects with colours you love. This DIY painted coasters project is the perfect way to get started.
We tried making ours in a bright and warm colour pallet and a contrasting cool colour pallet. But you really can’t go wrong. Just select colours that go nicely together and that make you feel good. It’s your custom project afterall, if the colours work for you, then they work for your home.
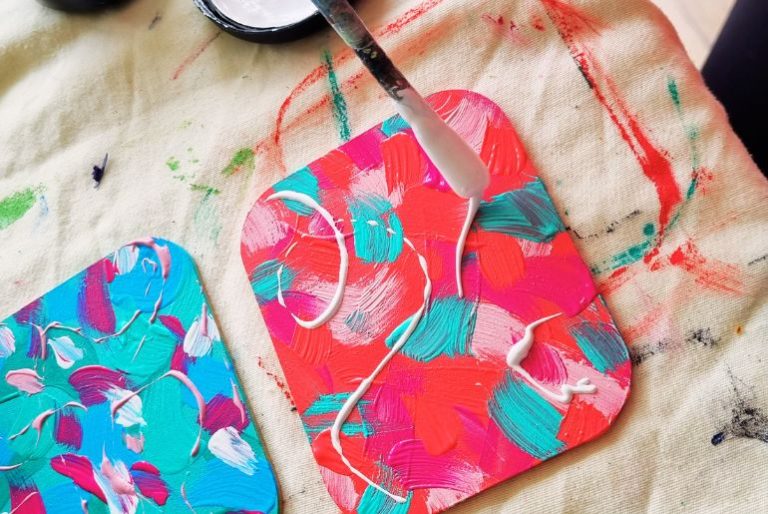
That said, if you want to create a similar design, I’ve given you all the colours we used in this project too. To get the same effect is our coasters, you’ll want to apply the paint in different ways. I’ve suggested applying strokes, brush flicks, some blending and even some drizzling.
But, again, really anything goes here. Feel free to have a play on a piece of card first, if you don’t feel confident to just start applying to the coasters straight away.
You will need
Wooden craft coasters (you can get these from all craft stores, or upcycle a set from secondhand or charity stores)
Resene test pot paints in Niagara (jeepers Creepers), Deep Sea, Picton Blue, Vibe, Can Can, White and Colour Me Pink.
Paint Brushes in different sizes
Resene Clear Art Glaze
What to do
Cool colour coasters
- Paint the base of your coaster all over in Niagara and let this dry. Add a second coat, be a little messy with the second coat. Note, if you found an old coaster set to upcycle, it likely has a gloss finish on it. If it does you’ll need to paint it first in Resene Smooth Surface Sealer, otherwise your paint may lift off.
- For a more interesting base colour, you could add a little white paint to the Niagara and paint a third base coat, but in a quick and messy way. This creates a little colour contrast as well as texture.
- Add brush flicks of paint in Deep Sea and Picton Blue and let this dry.
- Now add Colour Me Pink just using a light brush stroke and some extra flicks of Niagara.
- While the paints are still wet add some White and let it mix with the colours just a little.
- Lastly drizzle on Can Can the light pink colour on top.
- Once your coasters are completely dry seal them with Resene artists art glaze.

Warm colour coasters
- Paint the base of your coaster in Vibe and let it dry. Note, if you found an old coaster set to upcycle, it likely has a gloss finish on it. If it does you’ll need to paint it first in Resene Smooth Surface Sealer, otherwise your paint may lift off.
- Add brush flicks of paint in Colour Me Pink and Can Can and let this dry.
- Now add Niagara just using a light brush stroke and some flicks of Vibe.
- Lastly Drizzle with white paint.
- Once your coasters are dry seal them with Resene artists art glaze.
Because the coasters will have wet glasses sitting on them most of the time they’re in use, you will need to seal them. The clear art glaze works really well for this. You could also use a coat or two of polyurethane, ideally in satin gloss.
Now enjoy your new, customised DIY coasters with a lovely glass of refreshing homemade lemonade. Or package them up as a lovely custom-made gift. Check out Tweens and Teens: Creative arts and crafts for hundreds more ideas.


