Well it’s that time of year again! Halloween, it’s really creeped up on me this year. I’m running an art class for a group of kids aged 6-9, and I thought it be would be fun to set up an invitation to create a spooky Halloween box scene…
I love setting up little invitations to create for my own children, they always take my original idea much further than my own imagination.
I give you the step by steps on how I made mine below. But for your children I would suggest you just lay out the materials in an interesting way. This invites them to bring their imagination to the table, and every spooky scene will be different.
Spooky Halloween Box Scene
You will need
A shoe box (or something similar)
Black Resene test pot paint in Nero and Moonlight
Glitter
A bunch of small twigs from the garden
Cotton wool or thick wool
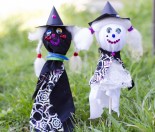
A bunch of Halloween type characters – I got mine from the The Warehouse and Spotlight
PVA Glue and a hot glue gun
String
Googly eyes
A4 card (optional for cutting out bats and ghosts)
Hairdryer
What to do
If you are creating this activity as an invitation to create, set out all your objects on trays.
If you do this before you children come into the room, they will be presented with an intriguing surprise. My kids always love the surprise element of seeing an invitation to create. Check out the photo below for some inspiration.

You might have some spooky books on display for ideas. You could have some spooky music playing for ambiance. When your child arrives, tell them you have set up a spooky scene activity for them and see what magic they create.
If you would like to do this activity step by step with your children here are the steps.
1. Paint your box in Black paint (for an effective scene I would give the box two coats).

2. Speed up the drying with a hairdryer (optional)
3. Sprinkle glitter onto the background to act as stars. I used white glitter.
4. Using PVA glue stick down some cotton wool on to the bottom of the box floor.

5. To make it look like a forest scene, just glue a bunch of sticks along the back of your box. I found using a glue gun for this to be the most effective, but strong craft glue will work.

6. To make a gravestone, break an iceblock stick in half and paint it black, then write the letters RIP on it. Glue this to your scene.

7. Randomly glue pairs of googly eyes onto the back of the box.
9. Paint in a white moon we used Resene Moonlight which has a soft yellow tint. You might like to use Resene FX Nightlight so that the moon glues in the dark!
8. Glue in a bunch a different Halloween characters to finish off the scene.