Discover how to turn the $199 Kmart Cubby House into a playhouse palace fit for a princess (and prince). We inject a bit of Kiwi flavour into the Kmart Cubby House makeover craze.
This past Christmas we really wanted to buy our kids a playhouse for the backyard. At the ages of 5 and 3 they’re still young enough to enjoy playing in their cubby house for a few years. But we knew that window was closing, so it was either this year, or not at all.
We were REALLY uninspired by the playhouse available in New Zealand. We spent AGES hunting online on sites like ebay and Trademe, and looked through all the kitset playhouse suppliers.
What we discovered is that cubby houses are either cheap, small and made of plastic, or substantial, kitset jobs and really, really expensive!
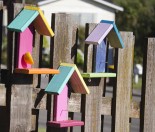
Our budget was just a few hundred dollars, which I realise is not a lot. As much as we’d LOVE to have something in the backyard like the KiwiPlay Moa, we just can’t afford that at the moment:

Discovering the Kmart Cubby House
To be honest, the search was becoming a little futile, and Christmas was fast approaching. And that’s when we stumbled upon this article on stuff.co.nz about the Kmart Cubby House makeover craze happening in Australia.
Needless to say we were blown away!
Of course this led to putting in some serious Pinterest ‘research‘ (that’s a rabbit hole you won’t come back from for a few hours there…).
And we were hooked on the idea of making our very own ‘Kiwi’ version of this awesome idea from across the ditch.
Now, if you want to create your own little perfect playhouse palace, this is an important point. These things sell like absolute HOTCAKES at Christmas time. We rang every Kmart in the country, and there were literally only a handful left at Kmart Hamilton. Every other store had sold out!
Unfortunately Kmart can’t ship all of their internet items. You’ll find their cubby houses listed on their website with ‘in store only’. This means they can’t ship them, and you can’t get them sent between stores either.
So if you want to upcycle your own cubby house, source one early or you could miss out altogether.
In our case, the amazingly priced cubby house suddenly became a bit more expensive with the shipping fee included.
We used Ship My Trade to get it down here, it was reasonably priced at around $60 I think, and they were great to deal with. But the playhouse only arrived here a couple days before Christmas, which was super-stressful. And it meant there was no time to put it together before Christmas Day, which was less than ideal.
‘Building’ the Playhouse
Putting these things together is an absolute doddle.
The instructions are straightforward, and the walls and roof are shipped pre-built. So it’s just a case of standing the walls up and screwing together. Screwing down the roof sections, and completing the window frames and planter boxes.
I got the kids out into the sunshine to help Dad ‘build’ their playhouse.

I think this is a really important part of the process. Sometimes Dads can be quick to takeover when it comes to DIY and kitset projects. But every time your kids pick up a drill, or a hammer, or a paintbrush, they learn a little bit more.
If you want your kids to be self-sufficient when they’re older use these sorts of projects to build their confidence early on.
And here’s what the cubby house looks like straight out of the box… Pretty cool actually. But could be even better!

Our Kiwi Kmart Cubby House Makeover
We had a fairly simple concept for our playhouse makeover. We wanted it to give it a bit of a Kiwi bach or crib flavour. We wanted a bit of brass, or copper bling added. And we wanted some sort of LED or solar-powered lighting, so it would pop a bit in the evenings.
We found some perfect colours at Resene for the job. We took the kids to the Resene Colorshop in Kapiti and let them choose their own colours, although in a very guided ‘here’s your colour range’ way!
Predictably our daughter choose pink for the inside, and our son choose blue for the outside.
The great staff from the Kapiti Colorshop also sold us a special primer for stained timber called Resene Wood Primer. This stuff is a solvent-based primer, so it’s not suitable for kids to use. But it goes on quick, and dries to a good, paintable surface. Perfect for the kids to help with the top-coats.
The outside colour is awesome. It’s called Norwester, which is perfect seeing as how we reside on the West Coast. And it’s literally a colour we’d choose to paint our actual house.
We used this colour for all of the outside walls:

And the inside colour is great too. It’s called Dust Storm. It’s born out of the millennial pink trend. But it’s more of a softer pastel with hints of salmon in it. It’s actually a really nice colour, and we may even use it inside the ‘big’ house.
We used this colour for all of the inside walls as well as the planter boxes:

Finally, we had some semi-gloss acrylic paint from an earlier project in a deep shade of blue/black called Resene Element. We thought this would go well with the Norwester, and protect the roof and door from knocks and weather.
With the colour seriously lifting the cubby house from ‘brown-stained boring’ to ‘classic Kiwi cool’, it was time to embellish.
To start with, we had to include grass. If this was going to be a Kiwi bach, it needed a lawn out the front, right?
Then we had to include gold letterbox numbering, as well as a gold door handle, to satisfy our thirst for bling.
We added in the quintessential Kiwi garden, of course. The cubby house’s planter boxes were perfect for this. We choose cyclamens for this purpose. They tolerate plenty of sun and a fair bit of drying out. And they totally remind us of those quaint, beachy rockgardens that were the rage in the 70s!
Finally, what classic Kiwi bach would be complete without some lantern party lights and a BBQ.
We’ve placed the kids’ playhouse right next to the ‘big’ house, on our actual deck. This means the kids can play in it and still be part of the action. And it’s under shelter, so they can play in there in inclement weather, including the fairly ferocious Norwester we get hit with every summer! And because the playhouse is out of the rain, they can keep all their toys and kids’ paraphenlia in there without everything becoming a mouldy, dank, rotting thing out in the backyard.
We’re really stoked with how our Kiwi-style Kmart cubby house makeover has turned out. The kids just LOVE it.
For hundreds more arts, crafts and DIY ideas, check out our Creative arts and crafts section.